 DIY Screen #1 |
The screen turned out very well and I was quite satisfied with the picture, especially considering the low cost of the materials (<$50). I would recommend that anyone unsure of what screen to choose to build one this way and try it before dropping a thousand or more on one of the commerical specialty screens. Unless your situation has special requirements (i.e high ambient light or projector with very low contrast) you may find this is all the screen you require.
Materials:
54" x 3 yds of blackout cloth (drapery lining) (~$10/yd)
32' of 1x2 lumber (very straight pieces!)
4 - 4" Flat Corner Braces
Wood Screws
Flat Black Latex Paint
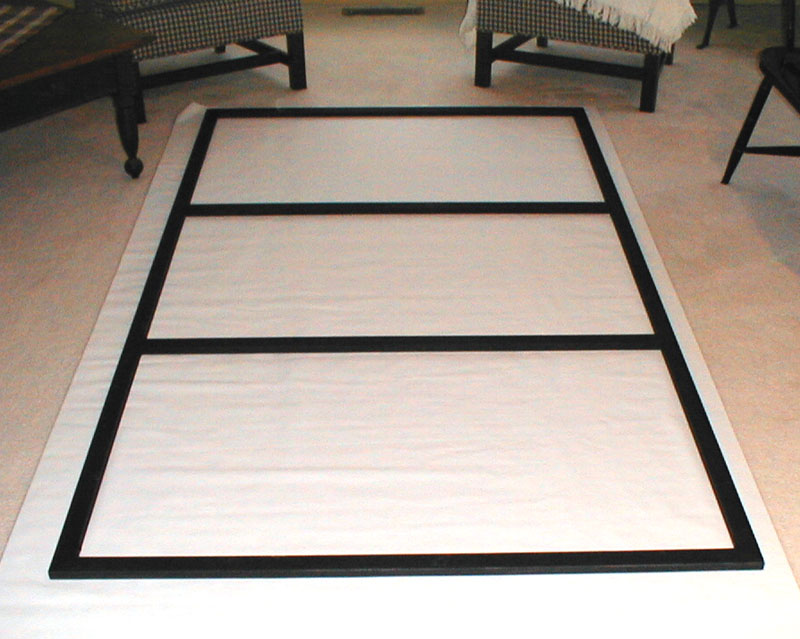 Here is the frame assembled and painted black to control any reflections. The cloth is underneath with the smooth side facing down. |
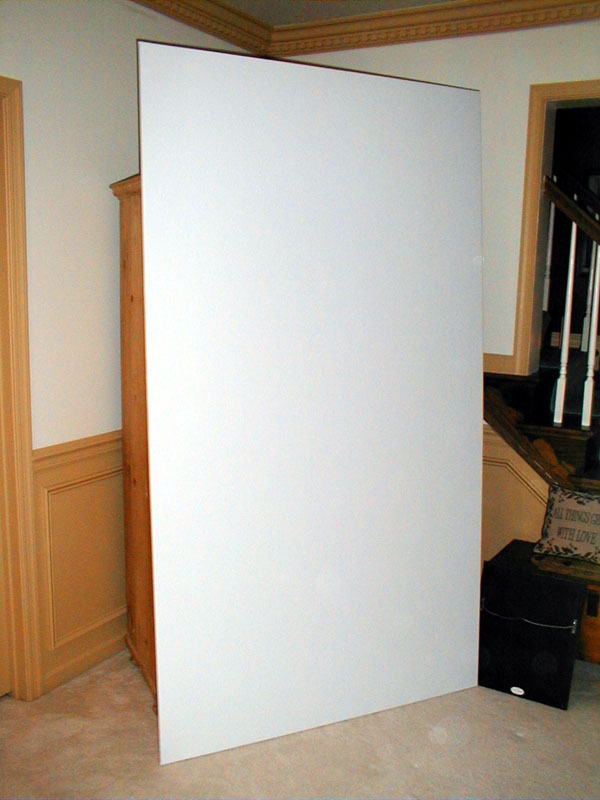 Here the fabric has been stapled to the frame and it is standing on end waiting to be installed. |
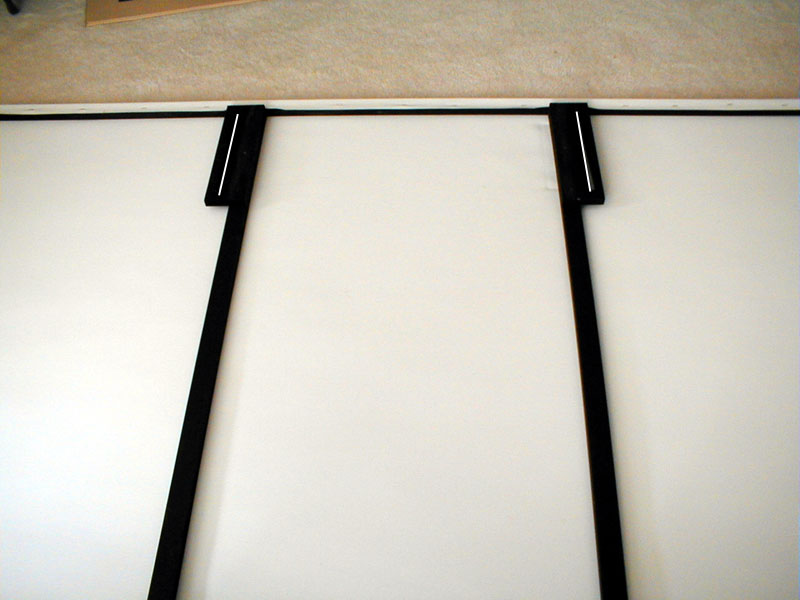 I mounted two blocks of wood on the top back of the screen. Each piece has a slot cut in it to accept a 1/4" bolt. This then passes through another block which mates with a piece on the wall. In this way I can adjust the height of the screen and level it using wing nuts to secure the moving block to the back of the screen. |
Please send me an email and let me know what you think.
DIY PROJECTS
DIY SCREEN #2
EQUIPMENT
HOME
Pictures and text from this site may not be used for commercial purposes without the express written permission of the owner.