 Space View Ports & |
One of the my favorite features of the room are the space view ports and the simulated computer screens. They give the room a real "space ship" feel. They were also a lot of fun and fairly easy (and cheap) to build.
Materials:
Plexiglas
Black spay paint
Small drill bits (sizes #60-70)
Inkjet Decal Film
Appropriate simulated computer graphic image files
1x4 and 1x6 pine boards for window frames
Tube LED lighting fixtures
LCARS Computer Screen Images (Do a Google search on 'LCARS image')
Velum Paper (White and colored as needed - Avialble at most craft stores)
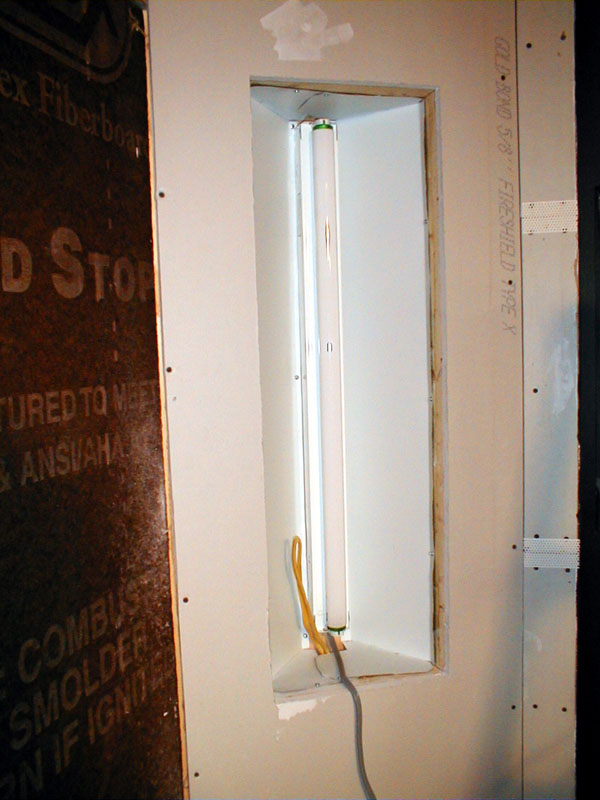 This shot shows the lightbox for the computer screen display under construction. It is made of sheet aluminum and contains a 3' florescent light fixture. (Update, all the florescent lights have been replaced with LED tubes.) The fixtures for the star field displays are made the same way. | 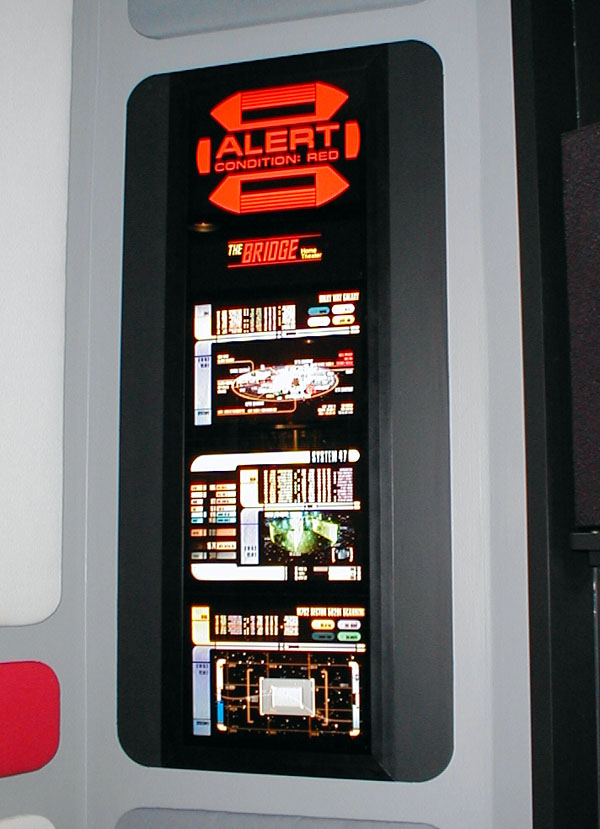 The simulated computer screens* were made by printing out suitable computer screen images onto clear inkjet decal film using an inkjet printer. Print the images in reverse (mirror image) so they can be applied to the back of the Plexiglas. Use as many as you need for the size of your display. |
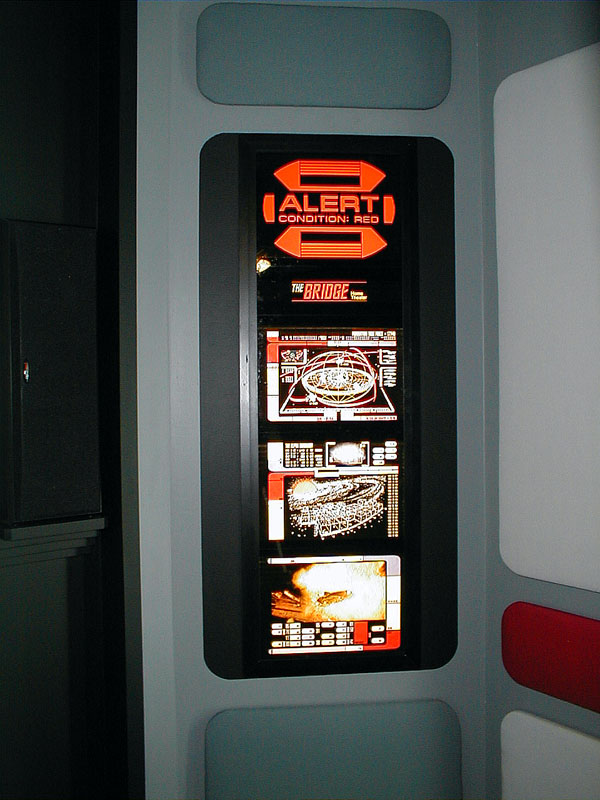 Once the images are printed out, apply them to the back of a piece of plexiglas. I used a detergent/water mixture to allow me to move the decal film and get rid of air bubbles. To diffuse the light source and intensify the color, place appropriately colored or white velum paper on the back with tape. The plexglas is then held in place with Velcro. |
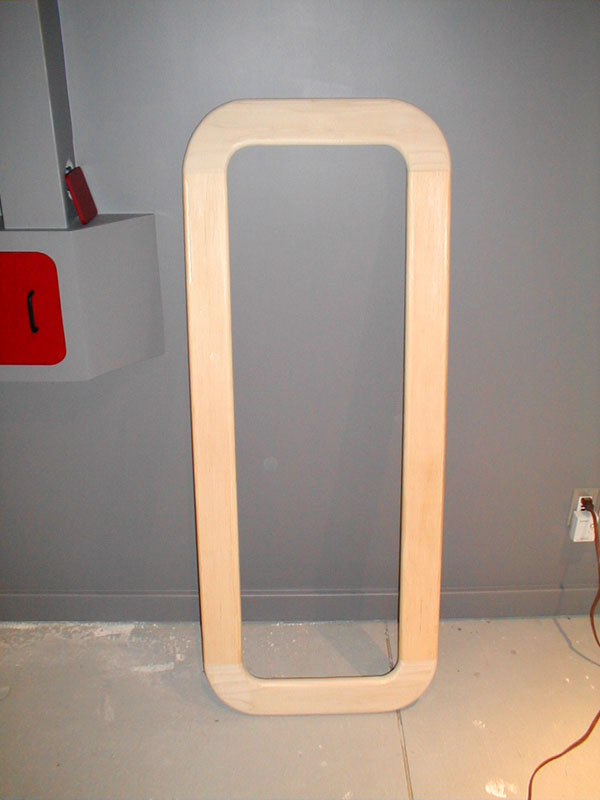 The framing of the view port is made from 1x4 and 1x6 pine suitably cut to shape. I used a 1/2" rounding over bit in a router to achieve the proper countour. A piece of plexiglas is then screwed to the back of the frame. | 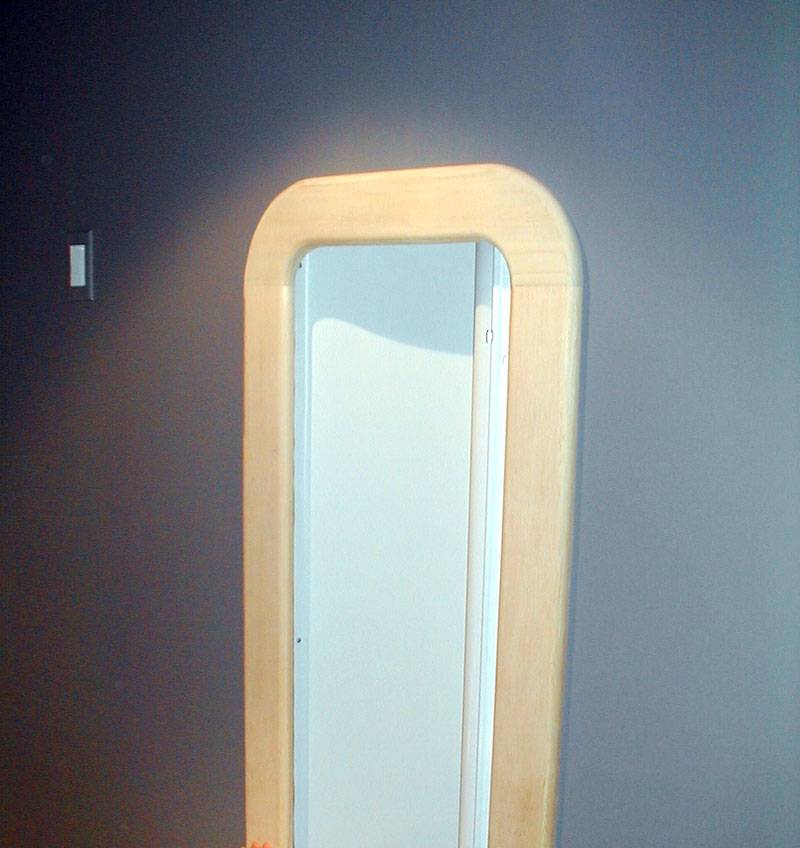 Here you see the frame installed on the wall over one of the four light-boxes constructed of aluminum sheet and a 4' light fixture. This will illuminate the stars from behind. | 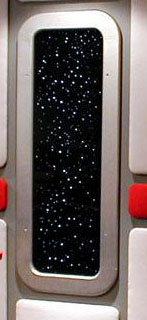 The star field in the view ports are made by painting the back of a piece of plexiglas flat black. Then take a #60 and #70 drill bit in a battery powered drill and make light taps on the painted side. DO NOT drill through the plexiglas. Use white velum paper taped to the back to diffuse the light. |
Please send me an email and let me know what you think.
* The graphics used for the simulated computer screens were produced by the many fans of Star Trek and are available from several sites on the web. Search using the keyword LCARS to find sites with these images.
DIY PROJECTS
HOME
PHOTO GALLERY
Pictures and text from this site may not be used for commercial purposes without the express written permission of the owner.