 Designing |

In pondering the concept for the home theater in the preceding section, I quickly realized that I had neither the space nor the budget for anything as elaborate as those theaters pictured on the previous page. Fortunately, being very handy with power tools and having finished a basement before, I knew I could do something within my budget and with the skills I had.
The room I had available, actually the quarter of my basement with the least number of obstructions (18'8"L x 14'2"W x 7'8"H) limited what I could do. It would be a cozy theater of perhaps 4-5 fixed seats with room for some folding chairs for overflow crowds. The small size did not really concern me as the main users of the theater are intended to be me, my wife and my son.
Let me start off by saying that I am not a die-hard "Trekie". While I do like the various incarnations of Star Trek on TV and film, I do not consider myself a fanatical fan. In building a home theater, I wanted something unique and fun. What better than a sci-fi themed theater based on a popular and recognizable franchise such as Star Trek.
The first thing that occurred to me was the similarity between the bridge on the Enterprise and a small theater. The view screen made an obvious film screen and the seating centered around the command chairs and behind would fit well in the small space I had. I therefore decided to make my theater into a loose replica of the bridge sets from the various Start Trek TV shows and movies. The front wall would hold a large "view" screen. In the back, a two level seating area with access ramps down each side. A small railing would separate the two. Other details (computer displays, lighting effects, etc.) could be included to give it that spaceship bridge feel.
While the room is not intended to represent any one particular version of the bridge, it primarily uses the color scheme from the original series (gray walls, red railing and consoles, red door, black trim, etc.) This scheme seemed the most compatabile with a theater environment rather than some of the lighter color schemes used in the TNG series and some of the movies. Some of the details are from the later shows and movies, such as the computer screens (LCARS) and the sign on the door. Of course I also included a suitable amount of my own design elements such as the central light fixture , moulding around the doors and shelves, acoustic fabric panels, etc. I was limited to what I could fabricate and to what would work well in a theater vs. a TV/movie soundstage!
Not being adept at drawing, I decided to use my model building talents to create a 1" to the foot scale model to work out the various construction and design details. The model is built out of 1/4" foam core board, balsa wood, construction paper and color computer printouts to represent the details on the walls.
As I proceeded with construction I would go back to the model to try out new ideas and fill in gaps that I had not yet finalized.
Click on the thumbnails below to see a larger picture.
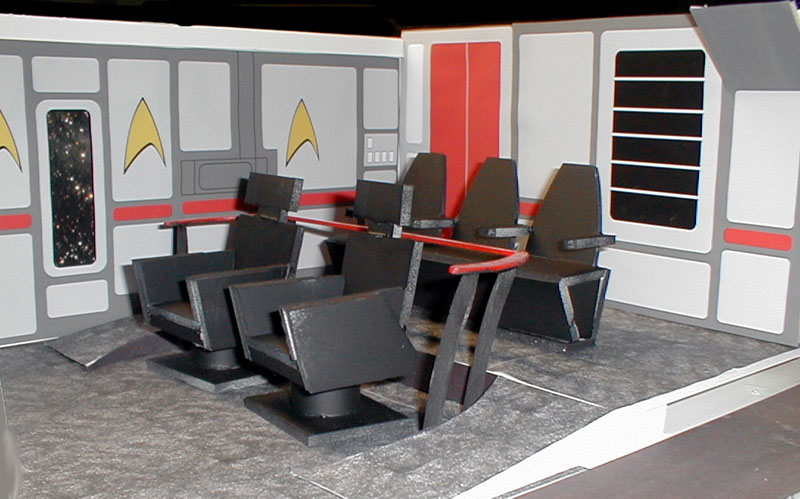
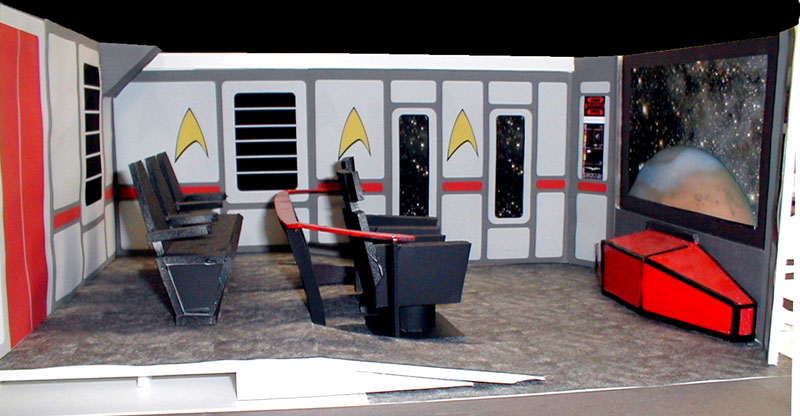 | A view from the side of the theater showing the overall layout and proportions. The furniture here is just for effect as the actual furniture will be more conventional. |
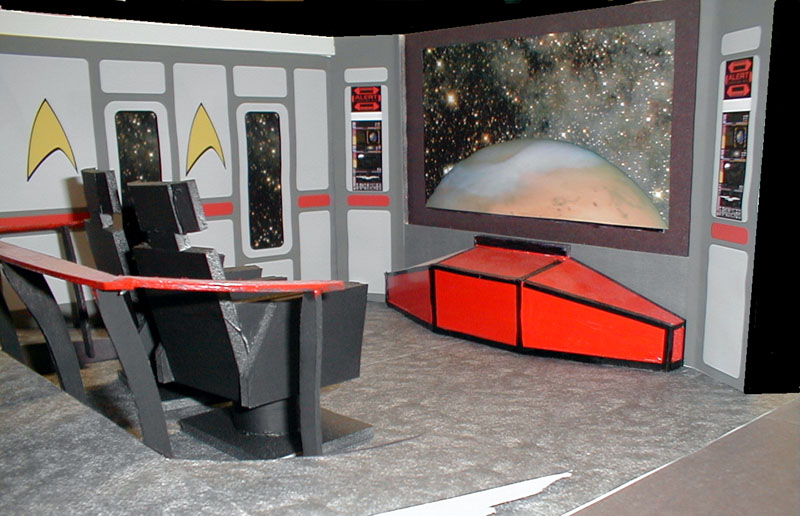 | View looking towards the 100" screen. The gold-colored Star Fleet emblems on the wall are custom made sconces I am building. See the Details page for more info on them. |
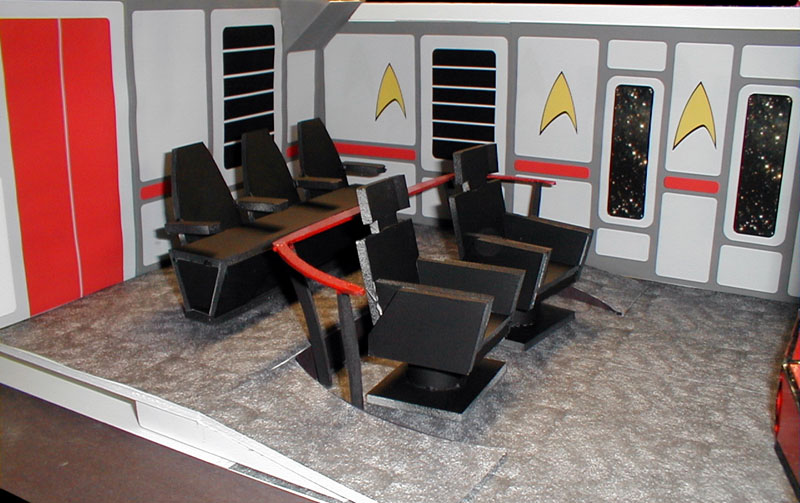 | View showing rear of theater with doorway to basement stairs, DVD storage shelves and equipment closet. Again, the furniture here is just for effect as the actual furniture will be more conventional appearing. |
 | This is a view from the opposite side. The light gray panels are intended to represent cloth covered panels that will be applied to the walls to tame the acoustics of the room. |
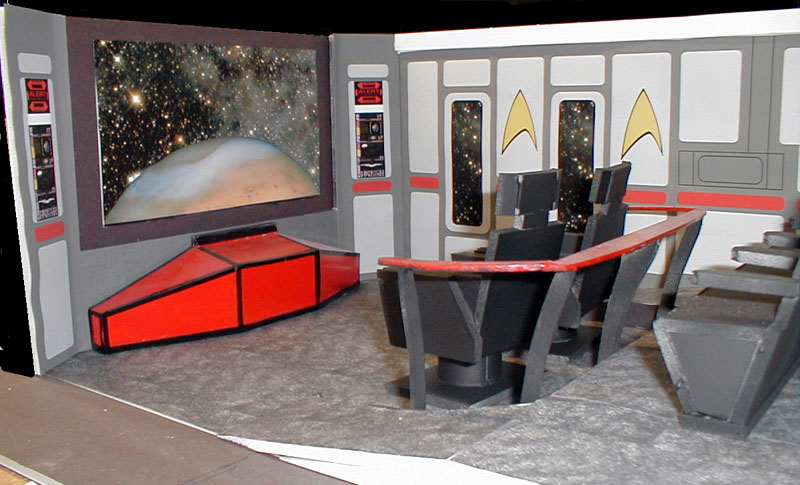
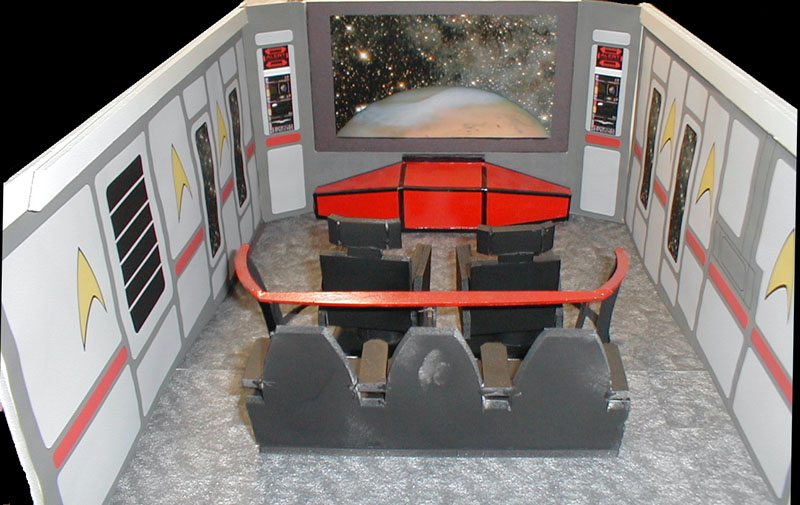
 | Again, the other side looking towards the screen. The large red and black structure under the screen (the proscenium) houses the subwoofer and is detailed to loosely represent the navigation console on the original series bridge. |
 | Over the top view. |
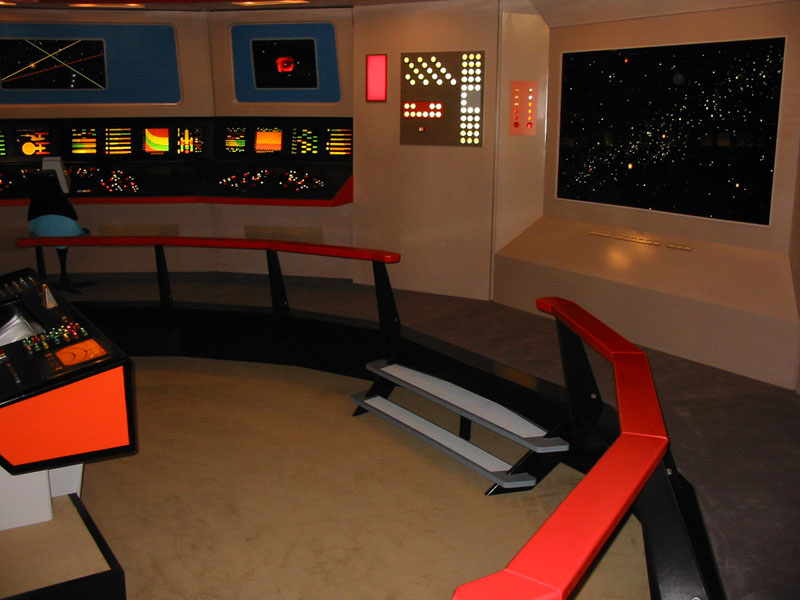
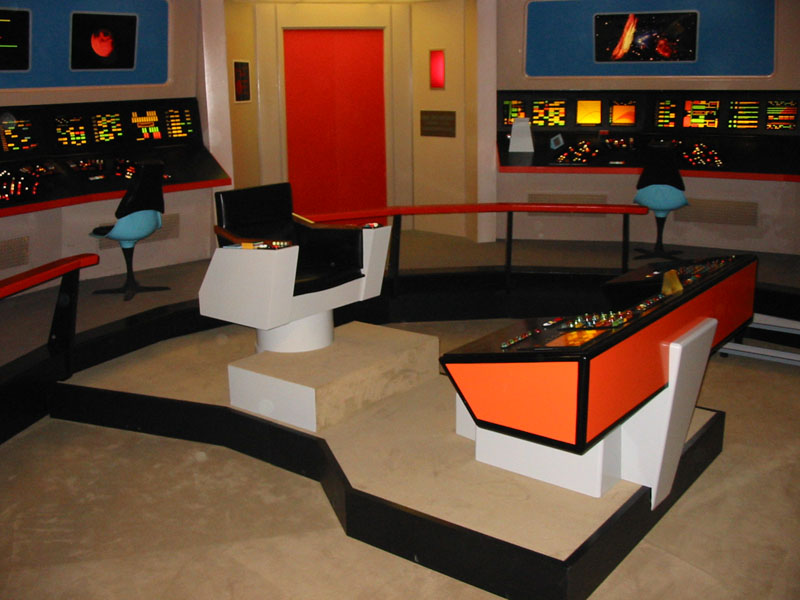
And in case you forget what the original Star Trek Bridge looks like, here are some images to refresh your memory:
So what did it take to build this? Read on...
CONSTRUCTION
BACK
HOME
CONCEPT